
Honeywell TH6320U2008 Installation Manual: A Comprehensive Plan
This manual details the installation of the Honeywell TH6320U2008 thermostat, offering guidance from initial setup to Wi-Fi connectivity.
Numerous online resources, like manuals.plus, provide visual aids and translated guides for diverse users.
Carefully follow these instructions for optimal performance and a seamless experience.
The Honeywell TH6320U2008 Pro Programmable Thermostat represents a significant upgrade for home climate control, offering enhanced features and energy-saving capabilities. This thermostat is designed for ease of use, allowing homeowners to customize heating and cooling schedules to fit their lifestyles. It’s a popular choice due to its reliability and compatibility with a wide range of HVAC systems.
Before beginning the installation process, it’s crucial to understand the thermostat’s core functionalities. The TH6320U2008 allows for 7-day programmable schedules, providing flexibility in managing your home’s temperature. It also features a clear, easy-to-read display and intuitive controls. Online resources, such as those found on manuals.plus, offer detailed overviews and installation guides in multiple languages, catering to a diverse user base.
This manual will guide you through each step of the installation, from verifying package contents to establishing Wi-Fi connectivity. Proper installation ensures optimal performance and allows you to take full advantage of the thermostat’s energy-saving features. Remember to prioritize safety and consult a qualified HVAC technician if you are unsure about any aspect of the installation process.
Package Contents and Verification
Upon opening the Honeywell TH6320U2008 package, carefully verify that all components are present and undamaged. A complete package typically includes the thermostat base, the thermostat display unit, mounting screws, wire labels, and this installation manual. Some packages may also contain a backplate for easier installation on existing walls.
It is essential to cross-reference the contents with the parts list provided within the manual. Missing components can delay the installation process. Inspect each item for any signs of physical damage, such as cracks or bent terminals. If any parts are missing or damaged, immediately contact the retailer or Honeywell customer support for replacements.
Before proceeding with the installation, familiarize yourself with each component. The wire labels are crucial for correctly identifying the wires from your existing thermostat. Proper labeling prevents wiring errors that could damage your HVAC system. Resources like manuals.plus often showcase images of the package contents, aiding in verification. Ensuring you have everything needed upfront streamlines the installation and minimizes potential issues.
Safety Precautions

Prior to commencing the installation of your Honeywell TH6320U2008 thermostat, it is paramount to prioritize safety. Always disconnect power to your HVAC system at the circuit breaker or fuse box. Failure to do so presents a serious risk of electrical shock or damage to the equipment. Verify the power is off using a non-contact voltage tester.
Exercise caution when handling wiring. Even with the power disconnected, residual voltage may be present. Avoid touching bare wires and ensure all connections are secure. If you are uncomfortable working with electrical wiring, consult a qualified HVAC technician. Improper wiring can lead to system malfunction or fire hazards.
Wear appropriate safety gear, including insulated gloves and eye protection. Be mindful of your surroundings and avoid working in damp or wet conditions. Keep the thermostat and its components out of reach of children. Refer to manuals.plus and other resources for visual guides, but always prioritize personal safety. Following these precautions will ensure a safe and successful installation.
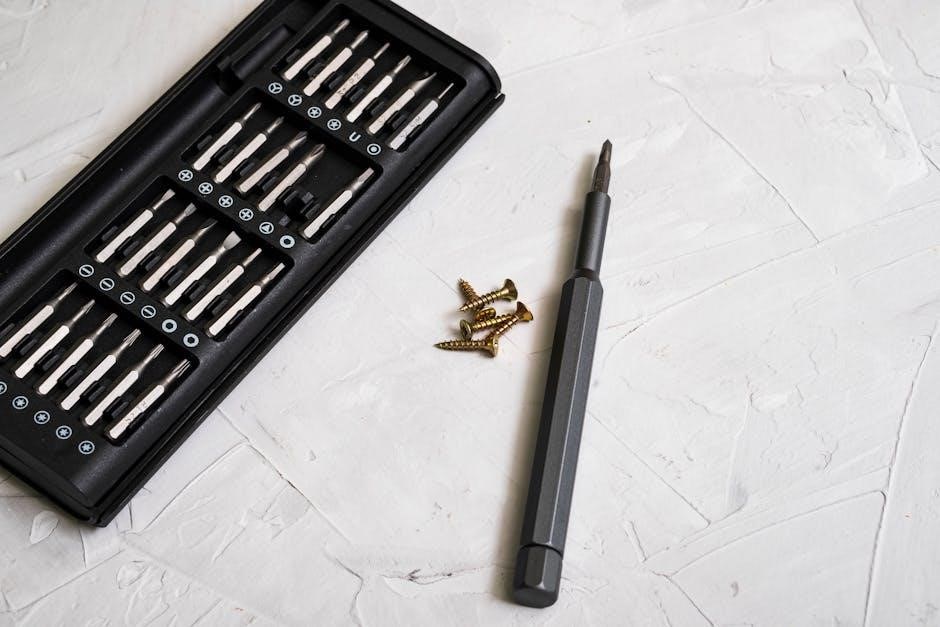
Tools Required for Installation
Successfully installing your Honeywell TH6320U2008 thermostat requires a few essential tools. A Phillips head screwdriver is crucial for removing the old thermostat and securing the new baseplate. A flathead screwdriver may be needed for certain terminal connections. A small level ensures the thermostat is mounted straight for accurate temperature readings.
Wire strippers are necessary for preparing the thermostat wires, ensuring clean connections; A non-contact voltage tester is vital for verifying the power is completely off before handling any wiring – a critical safety step. Pencil and paper are helpful for labeling wires before disconnecting them from the old thermostat, preventing confusion during re-wiring.
Needle-nose pliers can assist with manipulating wires in tight spaces. A drill with appropriate drill bits may be required if new mounting holes are needed. Resources like manuals.plus often showcase images of these tools in use. Having these tools readily available will streamline the installation process and contribute to a professional result.
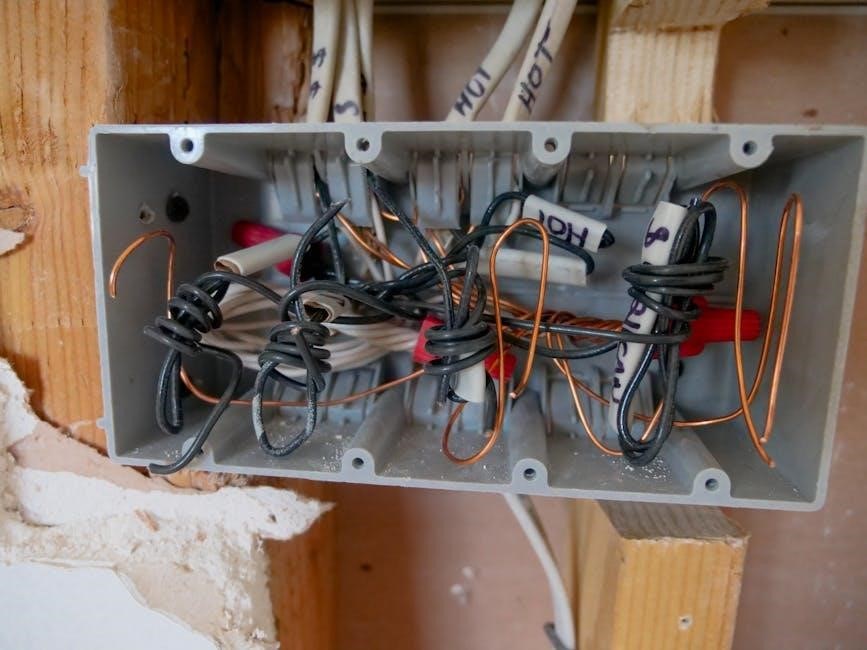
Understanding the Thermostat Terminals
Familiarizing yourself with thermostat terminals is essential for a correct Honeywell TH6320U2008 installation. The R terminal provides power to the thermostat. W terminal activates the heating system, while Y terminal controls cooling. G terminal manages the fan, and C terminal, the common wire, provides a constant power return path – often crucial for proper operation.
Identifying these terminals on both your old and new thermostats is paramount. Carefully label each wire before disconnecting anything. Some systems may have additional terminals like Aux (auxiliary heat) or O/B (reversing valve) for heat pumps. Online resources, such as manuals.plus, provide detailed terminal diagrams specific to the TH6320U2008.
Incorrect wiring can damage your HVAC system or the thermostat itself; If you are unsure about any terminal, consult a qualified HVAC technician. Understanding the function of each terminal and accurately matching the wires will ensure a smooth and safe installation. Double-check all connections before powering on the system.
Identifying Your HVAC System Type
Accurately identifying your HVAC system type is a critical first step before installing the Honeywell TH6320U2008 thermostat. Common systems include forced air (furnace and air conditioner), heat pumps, and radiant heating. Forced air systems utilize ducts to distribute heated or cooled air throughout your home.
Heat pumps provide both heating and cooling, reversing the refrigerant flow to change modes. Radiant systems, like hot water radiators, use heated water to provide warmth. Knowing your system type dictates the wiring configuration and thermostat settings. Resources like manuals.plus offer guidance on identifying your system based on its components.
Check your existing thermostat wiring and HVAC equipment for clues. A system with an ‘O’ or ‘B’ terminal typically indicates a heat pump. If you have multiple zones, you’ll need a thermostat compatible with zoning systems. Incorrectly configuring the thermostat for the wrong system type can lead to malfunctions or damage. If unsure, consult an HVAC professional for assistance before proceeding with the installation.
Removing the Old Thermostat
Before installing the Honeywell TH6320U2008, carefully remove your existing thermostat. First, turn off the power to your HVAC system at the circuit breaker to prevent electrical shock. This is a crucial safety precaution. Next, remove the thermostat cover, often by gently prying it off or releasing a latch.
Take a clear photograph of the existing wiring before disconnecting any wires. This photo will serve as a vital reference during the installation of the new thermostat. Label each wire with the corresponding terminal designation using the provided wire labels.

Carefully disconnect the wires one at a time, ensuring they don’t fall back into the wall. Loosen the screws holding the wires in place. Once all wires are disconnected, remove the old thermostat baseplate from the wall. Dispose of the old thermostat responsibly. Resources like manuals.plus emphasize the importance of documenting the wiring for a smooth transition;
Wiring the Honeywell TH6320U2008
With the old thermostat removed, and referencing the photograph you took, begin wiring the Honeywell TH6320U2008. Use the provided wire labels to connect each wire to the corresponding terminal on the new thermostat baseplate. Match the labels from your old thermostat to the terminals on the Honeywell unit – typically labeled R, C, W, Y, G, etc.
Ensure each wire is securely fastened to its terminal by tightening the screws. A loose connection can cause malfunctions. If you have a C-wire (common wire), connect it to the ‘C’ terminal; this is often required for consistent power. If you don’t have a C-wire, see the ‘C-Wire Considerations’ section for alternatives.
Double-check all connections against your wiring diagram and the thermostat’s wiring guide. Incorrect wiring can damage your HVAC system. Resources like manuals.plus highlight the importance of accurate wiring for optimal performance. Take your time and be meticulous during this step to avoid future issues.
C-Wire (Common Wire) Considerations
The C-wire, or common wire, provides continuous power to the Honeywell TH6320U2008 thermostat. Many older HVAC systems lack a C-wire, which can prevent the thermostat from functioning correctly. If you don’t have a C-wire, several options exist.
A C-wire adapter can be installed at the furnace or air handler to repurpose an existing wire. These adapters ‘borrow’ power from another wire, effectively creating a common wire. Alternatively, some HVAC systems have an unused wire in the thermostat cable that can be designated as the C-wire at both the thermostat and furnace ends.
Consulting a qualified HVAC technician is recommended if you’re unsure about installing a C-wire adapter or repurposing an existing wire. Incorrect wiring can damage your HVAC system. Resources like manuals.plus emphasize the importance of a stable power supply for reliable thermostat operation. Proper C-wire connection ensures consistent performance and avoids potential issues with the thermostat’s features.
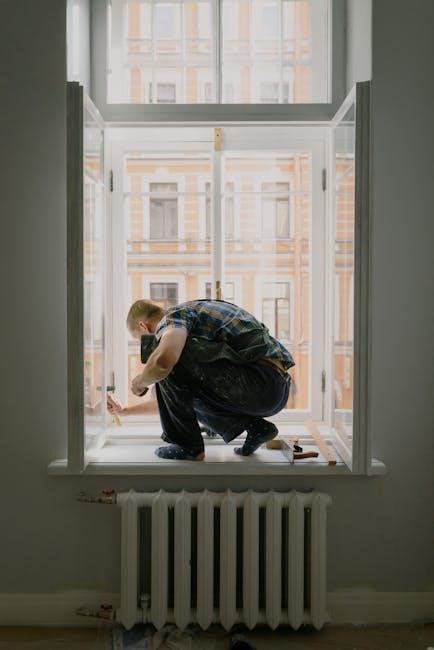
Installing the Thermostat Base
Before mounting the base, ensure the HVAC system’s power is completely switched off at the breaker box. This is a crucial safety precaution. The Honeywell TH6320U2008 baseplate is designed to accommodate most standard wall configurations. Use the included screws and wall anchors to securely attach the base to the wall, ensuring it’s level for a professional appearance.
Carefully feed the thermostat wires through the opening in the baseplate. Avoid pinching or damaging the wires during this process. Align the wires with the corresponding terminals, referencing the wiring diagram you established during the removal of the old thermostat. Double-check that each wire is securely inserted into its designated terminal on the baseplate.
Gently push any excess wire back into the wall cavity. Avoid overfilling the space, as this could create strain on the connections. Once the wiring is confirmed and secure, the baseplate should be firmly mounted to the wall, ready to receive the thermostat display unit. Resources like manuals.plus highlight the importance of a secure base for stable operation.
Attaching the Thermostat Display
With the base securely mounted and wired, carefully align the Honeywell TH6320U2008 thermostat display with the baseplate. The display unit is designed to snap into place, providing a clean and secure connection. Gently press the display onto the base, ensuring all edges are flush and that it clicks into position. Avoid forcing the display, as this could damage the internal connectors.
Once attached, verify the display is firmly seated and doesn’t wobble. A secure connection is vital for proper functionality and to prevent intermittent issues. Inspect the wiring connections through the baseplate opening to ensure none have been dislodged during the display attachment process.
Before restoring power, visually confirm all connections. Resources like manuals.plus emphasize the importance of a snug fit. The display should present a clear and unobstructed view of the thermostat interface. Now you are ready to proceed to powering on the thermostat and initiating the initial setup sequence, completing the physical installation phase.
Powering On and Initial Setup
After securely attaching the display, restore power to your HVAC system at the breaker box. The Honeywell TH6320U2008 should automatically power on, initiating the initial setup sequence. The display will likely guide you through a series of prompts, beginning with language selection. Follow the on-screen instructions carefully, using the thermostat’s touchscreen or buttons to navigate the menus.
The initial setup will ask you to confirm your HVAC system type – whether it’s a conventional system, heat pump, or other configuration. Accurate selection is crucial for proper operation. You’ll also be prompted to configure basic settings like date, time, and zip code. These settings enable features like weather-based temperature adjustments.
Refer to resources like manuals.plus for visual guidance during this process. The thermostat may also prompt you to connect to your home’s Wi-Fi network, enabling remote control and access to advanced features via the Honeywell Home app. Take your time and ensure each step is completed correctly for a smooth and functional setup.
Setting the Date and Time
Accurate date and time settings are fundamental for the Honeywell TH6320U2008’s scheduling and automation features. Following the initial power-up, the thermostat will prompt you to set these parameters. Access the date and time settings through the main menu, typically represented by a gear or settings icon on the touchscreen display.

Use the touchscreen or navigation buttons to adjust the month, day, and year. Similarly, set the current time, ensuring you correctly indicate AM or PM. The thermostat may offer options for automatic daylight saving time adjustments; enabling this feature is recommended to maintain accuracy throughout the year.
Confirm your selections after reviewing them carefully. Incorrect date or time settings can disrupt programmed schedules and affect the thermostat’s ability to accurately track energy usage. Online resources, such as manuals.plus, often include screenshots illustrating the menu navigation process. Double-check the settings to guarantee they align with your local time zone and current date.
Programming the Temperature Schedule
The Honeywell TH6320U2008 excels with its programmable scheduling, allowing customized temperature settings for different times of the day and days of the week. Access the scheduling menu through the thermostat’s main interface, usually indicated by a calendar or clock icon. You’ll likely encounter pre-set programs like “Home,” “Away,” “Sleep,” and “Wake,” which you can modify or create new ones.
Each program consists of multiple periods, each with a specific start time and target temperature. For example, you might set a lower temperature during “Sleep” and a comfortable temperature for “Wake.” The thermostat allows for different schedules for weekdays and weekends, accommodating varying routines.
Utilize the touchscreen or buttons to adjust these parameters. Online manuals, like those found on manuals.plus, provide step-by-step guidance and visual examples. Carefully review your schedule to ensure it aligns with your lifestyle and energy-saving goals. Consider utilizing the “Hold” function for temporary overrides when your routine deviates from the programmed schedule.
Understanding the Thermostat Display Icons
The Honeywell TH6320U2008 features a comprehensive display with various icons communicating the thermostat’s status and operation. A flame icon indicates the heating system is active, while a snowflake signifies cooling. A fan icon displays the fan’s operational mode – “Auto” for on-demand operation with heating/cooling, or “On” for continuous air circulation.
Battery icons alert you to low battery levels, prompting replacement to maintain functionality. A Wi-Fi icon confirms a successful connection to your home network, enabling remote control via the Honeywell Home app. Other icons may indicate system errors, filter change reminders, or the current program being executed.
Refer to the thermostat’s manual, readily available on resources like manuals.plus, for a complete icon glossary. Understanding these visual cues is crucial for effective operation and troubleshooting. Pay attention to flashing icons, as they often signal a specific issue requiring attention. Familiarizing yourself with these symbols ensures you can quickly interpret the thermostat’s status and adjust settings accordingly.
Testing the Heating and Cooling Functions
After installation, thoroughly test both the heating and cooling functions of your Honeywell TH6320U2008 thermostat. Begin by setting the thermostat to “Heat” mode and raising the temperature several degrees above the current room temperature. Verify that the heating system activates and warm air begins to circulate. Allow sufficient time for the system to respond – typically 5-10 minutes.
Next, switch the thermostat to “Cool” mode and lower the temperature below the current room temperature. Confirm that the cooling system engages and cool air is emitted. Again, allow adequate time for the system to react. Observe the thermostat display to ensure the appropriate icons (flame for heat, snowflake for cool) illuminate during operation.
Consult resources like manuals.plus if you encounter any issues. Check wiring connections and ensure the thermostat is properly configured for your HVAC system type. If problems persist, consult a qualified HVAC technician. Proper testing confirms successful installation and ensures comfortable, efficient climate control.
Troubleshooting Common Installation Issues
During Honeywell TH6320U2008 installation, several issues may arise. A frequent problem is an unresponsive thermostat, often due to incorrect wiring or a missing C-wire. Double-check all wire connections against the wiring diagram, ensuring each wire is securely fastened to the correct terminal. If a C-wire is absent, consider installing one or utilizing a C-wire adapter.

Another common issue is the thermostat not powering on. Verify the power supply to the HVAC system is active and the thermostat base is correctly mounted. Inspect the batteries (if applicable) and replace them if necessary. If the display is blank or flickering, a loose connection or faulty thermostat may be the cause.
Resources like manuals.plus offer valuable troubleshooting tips. For heating or cooling not functioning, confirm the system type is correctly configured within the thermostat settings. If problems persist, consult a qualified HVAC technician for assistance. Careful diagnosis and correction will ensure optimal performance.
Resetting the Thermostat to Factory Defaults
Resetting your Honeywell TH6320U2008 thermostat to factory defaults can resolve persistent issues or prepare it for a new installation. This process erases all personalized settings, including programmed schedules, Wi-Fi connections, and user preferences, returning the thermostat to its original state. Before resetting, note any critical settings you wish to retain.
The reset procedure typically involves navigating the thermostat’s menu. Access the settings menu, often represented by a gear icon, and locate the “Reset” or “Factory Reset” option. Confirm your choice when prompted, as this action is irreversible without re-configuration. The thermostat may briefly power cycle during the reset process.
Online resources, such as manuals.plus, provide detailed step-by-step instructions and visual guides for resetting the TH6320U2008. After the reset, you’ll need to re-establish your Wi-Fi connection, set the date and time, and reprogram your desired temperature schedules. This ensures the thermostat functions according to your specific needs.
Wi-Fi Connectivity and Mobile App Setup
Connecting your Honeywell TH6320U2008 thermostat to Wi-Fi unlocks remote control and advanced features through the Honeywell Home mobile app. This allows you to adjust temperatures, view energy usage, and receive alerts from anywhere with an internet connection. Ensure you have your Wi-Fi network name (SSID) and password readily available before beginning.
The initial setup typically involves entering the thermostat’s setup mode via the on-screen menu. Select the Wi-Fi option and choose your network from the list of available networks. Enter your password when prompted, and the thermostat will attempt to connect. A successful connection is usually indicated by a Wi-Fi icon on the display.
Download the Honeywell Home app (available on iOS and Android) and create an account. Follow the in-app instructions to add your thermostat, which may involve scanning a QR code or manually entering the thermostat’s serial number. Resources like manuals.plus offer guidance on troubleshooting connectivity issues and maximizing app functionality, providing a seamless smart home experience.